How to Make Leaf Mold to Enhance Soil Structure
Turn fall leaves into free, rich soil conditioner. Learn how to make leaf mold — a simple, no-effort amendment that improves water retention and soil structure.
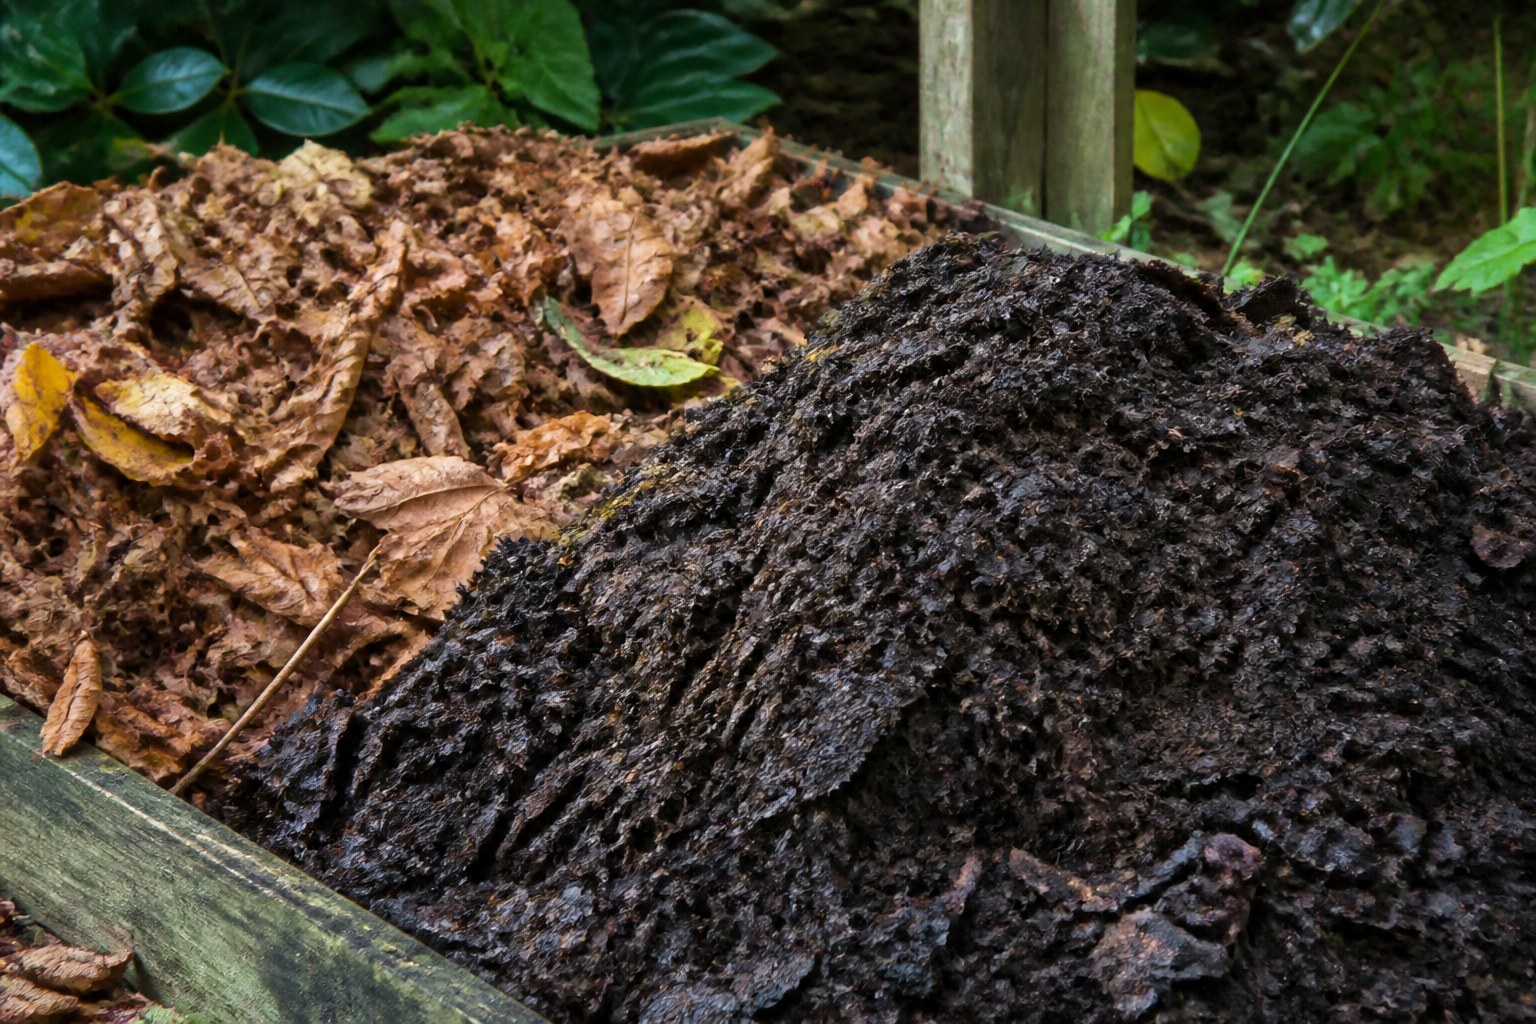
Those fallen autumn leaves are garden gold in disguise. Instead of bagging them for disposal, transform them into leaf mold — a rich, dark soil conditioner that improves water retention, structure, and microbial life. Here’s how to make it with minimal effort.
What Is Leaf Mold?
Leaf mold is decomposed leaves that have broken down into dark, crumbly organic matter.
Not the same as compost:
- Compost → Hot, fast decomposition of diverse materials (nitrogen + carbon)
- Leaf mold → Cold, slow decomposition of leaves alone (carbon only)
What leaf mold provides:
- Improves soil structure (makes clay workable, helps sand retain moisture)
- Increases water-holding capacity (up to 500%)
- Creates habitat for beneficial organisms (earthworms, bacteria, fungi)
- Reduces soil compaction
- Suppresses weeds when used as mulch
What leaf mold doesn’t provide:
- High nutrient content (it’s a soil conditioner, not fertilizer)
- Quick decomposition (takes 6-18 months)
Think of leaf mold as the forest floor — rich, spongy, dark material that makes plants thrive. It’s all about soil structure, not nutrition.
Why Make Leaf Mold?
Benefits:
Free: Leaves are abundant and free every fall
Effortless: No turning, no measuring, no monitoring — just wait
Space-efficient: Compact method requires minimal room
Improves any soil:
- Makes clay soil lighter and more workable
- Helps sandy soil retain water and nutrients
- Increases organic matter in all soil types
Long-lasting: Breaks down slowly in garden, providing sustained benefits
Lightweight: Easier to spread than compost
Weed-free: Cold process doesn’t spread weed seeds (unlike compost)
How Leaf Mold Forms
Decomposition process:
- Fungi (not bacteria) break down leaves
- Process is cold and slow (no heat generated)
- Takes 6-18 months depending on conditions
- End result: crumbly, earthy-smelling material
Fungi are key: Unlike compost, which relies on bacteria and heat, leaf mold is created by fungal decomposition. This is why it’s slower but also why it’s so effective at building soil structure.
Materials Needed
Essential:
- Fallen leaves (any type works)
- Black plastic garbage bags OR wire bin/pile
- Water source
Optional:
- Lawn mower (to shred leaves)
- Tarp
- Pitchfork or rake
That’s it — no compost activator, no nitrogen sources, no thermometer.
Method 1: Garbage Bag Leaf Mold (Easiest)
Perfect for small quantities, limited space, or urban gardens.
Instructions:
-
Collect leaves: Rake or blow leaves into piles
-
Shred leaves (optional but recommended):
- Run lawn mower over leaf piles
- Shredded leaves decompose 2-3× faster
- Creates finer finished product
- Skip this step if you don’t mind waiting longer
-
Fill bags:
- Use heavy-duty black garbage bags (contractor grade)
- Stuff with leaves
- Pack down to fit as many as possible
- Leave 2-3 inches space at top
-
Add moisture:
- Insert hose into bag
- Soak leaves thoroughly (like a wrung-out sponge)
- Don’t overdo it (waterlogged bags leak and smell)
-
Seal and puncture:
- Tie bag closed
- Poke 10-15 holes around bag with screwdriver or scissors (allows air and water entry)
-
Store:
- Place bags out of the way (side yard, behind shed, etc.)
- Partial shade ideal
- Can stack bags
- Leave in rain (natural moisture)
-
Wait:
- 6-12 months for shredded leaves
- 12-18 months for whole leaves
- Turn bags over halfway through (optional)
-
Harvest:
- Open bag when leaves are dark brown, crumbly, and smell earthy
- Some recognizable leaf pieces are fine
- Screen if you want fine texture
Pros:
- Minimal space required
- Portable (can move bags as needed)
- Neat appearance
- Retains moisture well
Cons:
- Bags eventually deteriorate (use heavy-duty)
- Limited quantity per bag
- Less air circulation (slower decomposition)
Method 2: Wire Bin or Pile (Larger Quantities)
Best for big yards with lots of leaves.
Building a wire bin:
- Purchase wire fencing or hardware cloth (4-foot height, 10-12 foot length)
- Form circle, overlap ends, secure with zip ties or wire
- Place in out-of-the-way location (behind shed, back corner)
Alternative: Use old compost bin, wood pallets, or chicken wire
Filling the bin/pile:
- Rake leaves into bin
- Tamp down every 6-8 inches
- Water each layer as you fill (moisten thoroughly)
- Top should be slightly concave (catches rain)
Optional improvements:
- Shred leaves first (speeds decomposition)
- Cover with tarp (retains moisture in dry climates)
- Add soil or finished leaf mold between layers (introduces fungi)
Maintenance:
- Water if pile dries out (once every few months in dry regions)
- Turn pile after 6 months (optional — speeds process but not required)
Timeline: 12-18 months for finished leaf mold
Pros:
- Large capacity
- Better air circulation
- Easy to add more leaves
- Free-standing (no container needed)
Cons:
- Takes up more space
- Less tidy appearance
- May dry out in arid climates
Method 3: Trench Composting (Instant Soil Improvement)
Bypass the wait — bury leaves directly in garden beds.
Instructions:
- Dig trench 12-18 inches deep in garden bed (do in fall or early spring)
- Fill with shredded leaves
- Cover with 6 inches of soil
- Let decompose in place (6-12 months)
- Plant over trench next season
Best for:
- Fall preparation for spring planting
- Improving specific bed areas
- No storage space for leaf mold
- Want results in place
Benefit: Leaves break down directly in root zone, improving soil exactly where plants need it.
Which Leaves Work Best?
Excellent (decompose quickly):
- Maple
- Birch
- Ash
- Fruit tree leaves
- Elm
Good (moderate decomposition):
- Oak (high in tannins; slightly acidic)
- Beech
- Poplar
Slow (take longer):
- Magnolia (thick, waxy)
- Holly (thick, tough)
- Eucalyptus (resinous)
Avoid:
- Black walnut (contains juglone, toxic to some plants)
- Diseased leaves (may spread pathogens)
- Leaves from roadsides (may contain heavy metals)
Mixed leaves work great — don’t stress about separating types.
Shredding: Worth the Effort?
Shredding benefits:
- 2-3× faster decomposition
- Finer finished texture
- More compact storage
- Better for mulch
Methods:
Lawn mower (easiest):
- Spread leaves on lawn
- Mow over them several times
- Collect in mower bag or rake up
Leaf shredder (fastest):
- Dedicated machine
- Processes large volumes quickly
- $100-300 investment
String trimmer in trash can:
- Place leaves in large trash can
- Insert running trimmer, move around
- Free if you own trimmer
Skip shredding if:
- You don’t mind waiting 12-18 months
- Leaves are already thin (maple, birch)
- Storing in bags (holds moisture well even if not shredded)
Signs Leaf Mold Is Ready
Finished leaf mold:
- Dark brown to black color
- Crumbly texture (breaks apart easily)
- Earthy, forest-floor smell
- Cool temperature
- 50-70% of leaves broken down (some recognizable pieces okay)
Not ready:
- Light brown color
- Leaves still intact
- Dry and crispy
- No earthy smell
Patience: Leaf mold is ready when it’s ready. Don’t rush it.
How to Use Leaf Mold
As Soil Amendment
For garden beds:
- Spread 2-4 inch layer on top
- Dig into top 6-8 inches of soil
- Best time: Fall or early spring
For vegetable gardens:
- Mix 20-30% leaf mold into planting holes
- Improves water retention for fruiting crops
- Excellent for tomatoes, peppers, cucumbers
For containers:
- Mix 10-20% leaf mold into potting mix
- Improves water retention
- Reduces watering frequency
As Mulch
- Spread 2-3 inch layer around plants
- Keep 2-3 inches away from stems/trunks
- Suppresses weeds
- Retains moisture
- Adds organic matter as it breaks down
Best for mulch: Perennial beds, shrub borders, fruit trees
As Lawn Top-Dressing
- Screen leaf mold to fine texture
- Spread ¼-½ inch layer over lawn
- Rake in
- Improves soil structure gradually
- Do in fall or spring
For Seed Starting
- Screen very finely
- Mix with equal parts compost and perlite/vermiculite
- Light, moisture-retentive medium for seeds
Making Leaf Mold Tea
Liquid application for houseplants or container gardens:
- Fill bucket halfway with leaf mold
- Add water to fill
- Steep 2-3 days
- Strain
- Use undiluted
Benefit: Adds beneficial fungi and mild nutrients to plants
Speeding Up the Process
Want faster leaf mold? Try these:
Shred leaves → Reduces time by 30-50%
Add nitrogen (grass clippings, blood meal) → Speeds breakdown (but technically becomes compost)
Keep moist → Check monthly; water if dry
Turn pile → Introduces oxygen (every 3-6 months)
Add soil or finished leaf mold → Introduces fungi
Use thin-leaved species → Maple decomposes much faster than oak
Even with these, expect 6-12 months minimum.
Storing Finished Leaf Mold
Short term (1-2 months):
- Leave in bags or bin
- Keep slightly moist
- Use as needed
Long term (up to 1 year):
- Store in covered bins or bags
- Keep moist but not soggy
- Store in shade (prevents drying out)
Leaf mold doesn’t “expire” — it’s stable and can be stored indefinitely if kept moist.
Troubleshooting
Leaves aren’t breaking down:
- Too dry → Water thoroughly
- Needs more time → Leaf mold is slow; wait
- Leaves too thick → Shred or chop
Smells bad:
- Too wet → Poke more holes in bag or add drainage
- Anaerobic conditions → Add air (turn or aerate)
- Should smell earthy, not rotten
Attracting pests:
- Rare for leaf mold (unlike compost)
- If rodents nest in pile, contain in bin with hardware cloth bottom
Leaves blowing away:
- Use bins or bags instead of open piles
- Cover pile with tarp or chicken wire
- Weight edges with rocks or logs
Leaf Mold vs. Compost
Use leaf mold when:
- You need to improve soil structure
- You want easy, no-maintenance process
- You have lots of leaves, little time
- You want weed-free amendment
Use compost when:
- You need plant nutrients
- You want faster results (2-6 months)
- You have diverse organic materials
- You don’t mind turning and monitoring
Best approach: Use both! Leaf mold for structure, compost for nutrition.
For complete composting guidance, see our beginner’s composting guide.
Common Mistakes
1. Not adding water → Leaves won’t decompose when dry
2. Expecting fast results → This process takes time; be patient
3. Using diseased leaves → May spread disease to garden
4. Overfilling bags → Bags split; leave room for expansion
5. Storing in full sun → Dries out too fast; partial shade better
6. Using as sole fertilizer → It’s a conditioner, not a fertilizer; still need nutrients
Year-Round Leaf Mold Strategy
Fall:
- Collect and bag/bin all fallen leaves
- Shred if possible
- Moisten and store
Winter:
- Let sit undisturbed
- Bags/bins insulate themselves
Spring:
- Check progress
- Turn bags over
- Add spring leaves to new batch
Summer:
- Check moisture monthly (water if needed)
- Start using finished leaf mold from previous year
Ongoing:
- Maintain 2-year rotation
- Year 1: Collect and store new leaves
- Year 2: Use finished leaf mold from previous year
The Bottom Line
Leaf mold is the easiest soil amendment you’ll ever make. Shove leaves in a bag, add water, forget about them for a year, and harvest finished product. No turning, no temperature monitoring, no nitrogen balancing — just time.
The result is a rich soil conditioner that improves water retention, structure, and microbial life in any garden. Your plants won’t care that it took 18 months — they’ll just thrive in improved soil.
Start your first batch this fall. Collect leaves, bag or bin them, moisten thoroughly, and mark your calendar for next year. By the time you’re ready to use it, you’ll have forgotten you even made it — which is exactly the point of this low-effort, high-reward soil amendment.
Stop paying for bagged soil conditioner and hauling leaves to the curb. Make leaf mold instead and turn autumn’s bounty into next year’s garden success.