How To Save Over Fertilized Plants: Emergency Recovery Guide
Rescue plants from fertilizer burn with proven emergency treatment. Learn to recognize symptoms, flush excess salts, and restore plant health after over-fertilizing.
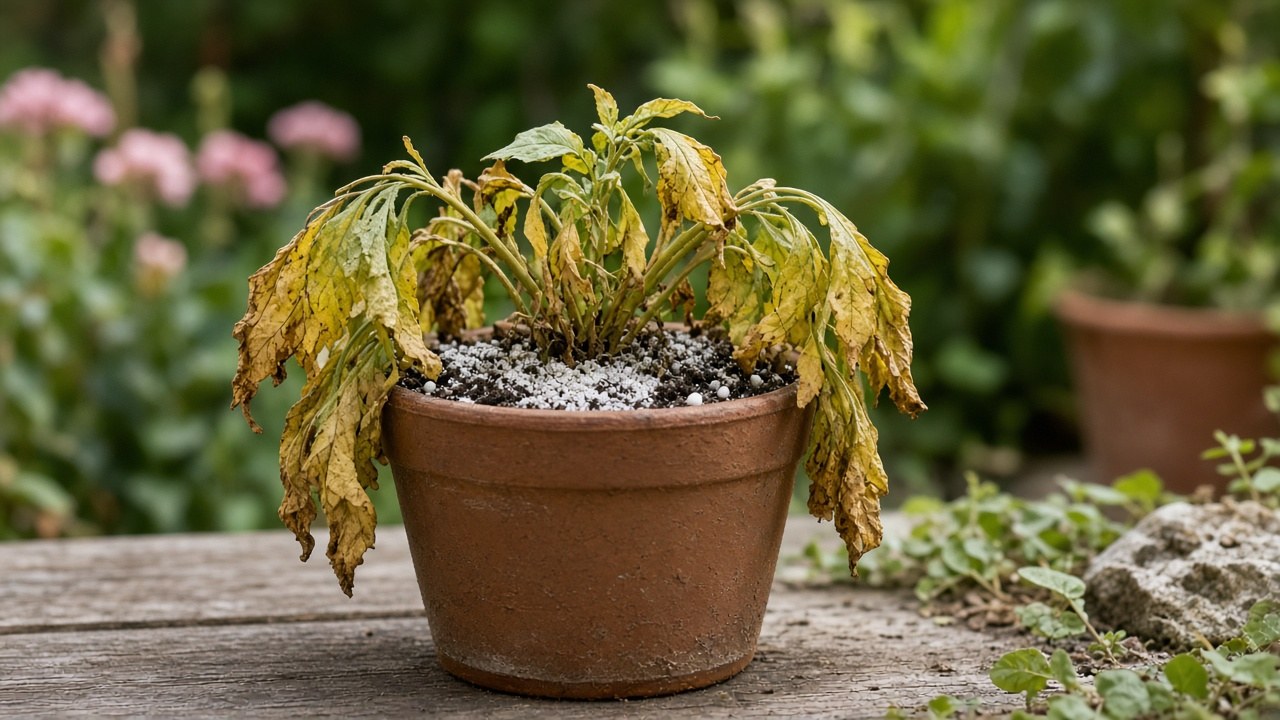
Over-fertilization is one of the most common and devastating mistakes in gardening. Excess fertilizer salts burn roots, damage leaves, and can kill plants within days if not addressed immediately. Whether you applied too much fertilizer, used the wrong concentration, or fertilized dry soil, rapid intervention can save even severely damaged plants. Here’s how to recognize fertilizer burn and rescue affected plants.
What Is Fertilizer Burn?
Fertilizer burn occurs when concentrated fertilizer salts accumulate in soil and damage plant tissues.
How fertilizer burn happens:
- Excess salts: Too much fertilizer releases excessive mineral salts in soil
- Osmotic stress: High salt concentration draws water out of plant roots (reverse osmosis)
- Root dehydration: Roots lose water to surrounding soil instead of absorbing it
- Cellular damage: Concentrated salts burn root tips and fine root hairs
- Nutrient imbalance: Excessive amounts of one nutrient block uptake of others
- Soil chemistry disruption: pH changes; beneficial microbes die
Common causes:
- Over-application: Using more fertilizer than recommended
- Double-dosing: Applying fertilizer twice by mistake
- Dry soil fertilizing: Applying to dry roots (concentrates salts)
- Wrong product: Using strong fertilizer on delicate plants
- Slow-release pellets piled up: Concentrated in one spot
- Buildup over time: Repeated applications without flushing
- Container plants: More vulnerable (limited soil volume to dilute salts)
Why it’s dangerous:
- Damages fine feeder roots that absorb water and nutrients
- Kills beneficial soil microorganisms
- Can progress from minor damage to plant death in 48-72 hours
- Weakened plants become susceptible to disease and pests
- Some damage is permanent (leaf burn won’t heal)
Recognizing Fertilizer Burn Symptoms
Early detection improves chances of recovery.
Leaf symptoms:
Early stage (first 24-48 hours):
- Leaf tip burn: Brown, crispy tips on leaf margins
- Leaf edge browning: Scorched appearance along leaf edges
- Yellowing: Lower leaves turn yellow (sign of stress)
- Wilting: Plants wilt even when soil is moist
- Dull appearance: Leaves lose natural shine
Advanced stage (3-7 days):
- Severe browning: Large portions of leaves turn brown and crispy
- Leaf drop: Rapid defoliation (leaves fall prematurely)
- New growth affected: Young leaves emerge distorted, stunted, or burned
- Complete wilting: Entire plant collapses despite adequate water
- Stem damage: Stems turn brown at soil line (root damage progressing)
Root symptoms:
Check roots (if possible without further disturbing plant):
- Brown or black root tips: Burned areas where salts contacted roots
- Soft, mushy roots: Root rot developing (secondary infection)
- Reduced root mass: Fine root hairs dead or dying
- White salt crust: Visible salt deposits on root ball surface
- Foul odor: Rotting roots from severe damage
Soil symptoms:
- White crust on soil surface: Salt buildup visible as white or gray crust
- Crusty deposits on pot rim: Salt residue above soil line (containers)
- Slow drainage: Salt buildup clogs soil pores
- pH changes: Soil becomes more acidic or alkaline
- Foul smell: Damaged roots beginning to rot
Plants most susceptible:
- High risk: Seedlings, young transplants, succulents, ferns, azaleas, hydrangeas, African violets
- Moderate risk: Most vegetables, annual flowers, tropical houseplants
- Lower risk: Established woody plants, native plants, drought-tolerant species
Immediate Emergency Treatment
Act within 24-48 hours for best results.
Step 1: Stop all fertilizer application
Immediately cease fertilizing:
- Don’t add any fertilizer for at least 4-6 weeks
- Remove any visible fertilizer granules from soil surface
- Pick up slow-release pellets if concentrated in spots
- Stop using fertilizer-enriched potting soil for transplanting
Step 2: Remove damaged foliage
Prune burned leaves and stems:
- Cut off leaves that are more than 50% brown or yellow
- Remove completely dead foliage
- Trim brown leaf tips back to green tissue (cosmetic but reduces stress)
- Disinfect pruning tools between cuts (prevent disease spread)
- Don’t remove more than 30% of total foliage at once (further stresses plant)
Why pruning helps:
- Reduces water demand on damaged root system
- Removes tissue that could harbor disease
- Allows plant to focus energy on recovery
- Improves appearance
Step 3: Flush soil with water (most critical step)
For container plants:
-
Move plant to sink, tub, or outdoors:
- Ensure excellent drainage (remove saucer if present)
- Place where excess water can drain freely
-
Flush with large volume of water:
- Use room-temperature water
- Slowly pour water over soil surface
- Continue until water runs clear from drainage holes
- Total water volume: 2-3 times the pot volume
- Example: 1-gallon pot = flush with 2-3 gallons water
-
Repeat flush 2-3 times:
- Let pot drain for 15-30 minutes
- Flush again with another 2-3 pot volumes of water
- Repeat once more
- Total: 3 separate flushes within 2 hours
-
Let drain completely:
- Allow pot to drain for 1-2 hours
- Don’t let plant sit in standing water
- Return to saucer only after drainage stops
For garden beds and in-ground plants:
-
Water deeply and slowly:
- Apply water at slow rate (soil must absorb, not run off)
- Use soaker hose, drip irrigation, or slow-running regular hose
- Water for 2-4 hours continuously
-
Total water volume:
- Apply 2-3 inches of water over affected area
- Use rain gauge or tuna can to measure
- More is better for severe over-fertilization
-
Repeat if needed:
- Wait 24 hours
- If soil surface still shows white salt crust, water again
- May need 2-3 deep watering sessions over several days
Why flushing works:
- Dissolves and washes away excess fertilizer salts
- Leaches salts below root zone
- Restores normal soil moisture and osmotic balance
- Allows roots to rehydrate
Important flushing considerations:
- Don’t overwater repeatedly: After initial flush, return to normal watering schedule
- Ensure good drainage: Standing water causes root rot
- Avoid cold water: Cold water shocks stressed roots
- Time of day: Flush in morning or evening (not hot midday sun)
Step 4: Move plant to optimal recovery conditions
Environmental adjustments:
Light:
- Move to bright indirect light (not full sun)
- Stressed plants can’t handle intense light
- Leaves burn more easily when roots damaged
- Return to full sun gradually after recovery
Temperature:
- Keep in moderate temperatures (65-75°F ideal)
- Avoid temperature extremes
- Keep away from heating/cooling vents
- Protect from drafts
Humidity:
- Increase humidity if possible (50-60% ideal)
- Mist leaves lightly 1-2 times daily (not on hairy-leaved plants)
- Use humidity tray or humidifier
- Group plants together
Air circulation:
- Ensure good air movement (reduces disease risk)
- Don’t crowd plants together
- Use small fan on low setting if needed
Ongoing Recovery Care
Support plant through recovery period (4-12 weeks).
Watering during recovery:
Adjust watering schedule:
- Check soil moisture daily
- Water when top 1-2 inches dry (finger test)
- Don’t let soil dry out completely (roots still damaged)
- Don’t keep constantly wet (increases rot risk)
- Water less than usual (damaged roots can’t absorb as much)
Watch for signs:
- Continued wilting despite moist soil = more root damage than expected
- Yellowing lower leaves = possible overwatering during recovery
- New leaves emerging = root system recovering
Monitor for secondary problems:
Root rot:
- Damaged roots susceptible to fungal infections
- Symptoms: Mushy stems, foul smell, continued wilting
- Prevention: Ensure excellent drainage; don’t overwater
- Treatment: If rot develops, repot in fresh soil; remove rotted roots
Pest infestations:
- Stressed plants attract pests (spider mites, aphids, mealybugs)
- Inspect weekly for pests
- Treat immediately if detected
- See our guides on spider mites and mealybugs
Disease:
- Burned leaves and damaged roots invite fungal and bacterial disease
- Watch for spreading brown spots, mold, or decay
- Remove affected parts immediately
- Improve air circulation
When to resume fertilizing:
Timeline:
- Minimum: Wait 4-6 weeks after treatment
- Better: Wait until plant shows clear signs of new growth
- Severe damage: Wait 8-12 weeks; ensure full recovery first
How to resume safely:
- Start with 1/4 strength: Dilute fertilizer to 25% of recommended rate
- Use liquid fertilizer: More control than granules; easier to adjust
- Increase gradually: After 2 weeks, increase to 1/2 strength if plant responds well
- Full strength after 6 weeks: Only if plant fully recovered
- Avoid slow-release: Use liquid feeds until plant robust again
Container Plant Repotting (For Severe Cases)
If flushing doesn’t work or damage is extreme.
When to repot:
- Heavy salt buildup visible on soil and roots
- Plant continues declining despite flushing
- Soil drains poorly after flushing
- Container plant that can be easily repotted
Repotting procedure:
-
Prepare new container and soil:
- Clean pot same size as current (or slightly larger)
- Use fresh, high-quality potting mix
- Don’t use fertilizer-enriched soil
- Ensure pot has drainage holes
-
Remove plant from pot:
- Water lightly 1 hour before (loosens root ball)
- Tip pot on side; slide plant out
- Be gentle (roots are damaged)
-
Inspect and clean roots:
- Gently shake off old soil
- Rinse root ball under room-temperature water (removes salt-contaminated soil)
- Trim dead, black, or mushy roots with clean shears
- Leave as much healthy root tissue as possible
-
Repot in fresh soil:
- Add soil to pot (don’t pack tightly)
- Position plant at same depth as before
- Fill around roots with fresh soil
- Water gently to settle soil
-
Provide post-repotting care:
- Place in bright indirect light
- Water when top inch of soil dries
- Don’t fertilize for 6-8 weeks
- Monitor closely for shock or decline
Risks of repotting stressed plants:
- Repotting adds stress to already-damaged plant
- Only repot if flushing failed or plant severely declining
- Don’t repot if plant is showing signs of recovery after flushing
Treatment for Specific Plant Types
Different plants require adjusted approaches.
Lawns and turfgrass:
Symptoms:
- Brown streaks or patches where fertilizer spilled or overlapped
- Dead grass in stripes (fertilizer spreader pattern)
- Yellow grass (nitrogen toxicity)
Treatment:
- Water heavily: Apply 2 inches water over 2-3 days
- Aerate affected areas: Core aerate to improve water penetration
- Continue watering: Keep soil moist for 2 weeks
- Overseed dead patches: After 4-6 weeks, reseed bare spots
- Resume fertilizing: Wait 6-8 weeks; use half-rate applications
Garden vegetables:
Symptoms:
- Leaf tip burn on tomatoes, peppers, cucurbits
- Blossom end rot (calcium uptake blocked by excess nitrogen)
- Stunted growth; yellowing
Treatment:
- Flush soil deeply: 2-3 inches water
- Side-dress with compost: Adds beneficial microbes; buffers salts
- Foliar spray with kelp: Provides micronutrients; supports recovery
- Calcium spray: If blossom end rot develops (1 tbsp calcium chloride per gallon water)
- Harvest mature fruit: Reduces plant stress
Seedlings and transplants:
Symptoms:
- Wilting immediately after fertilizing
- White salt crust on seed-starting mix
- Death within 24-48 hours
Treatment:
- Flush gently: Don’t wash away seedlings; water lightly but repeatedly
- Transplant if possible: Move to fresh seed-starting mix if very young
- Mist leaves: Keep humidity high during recovery
- Thin if crowded: Reduce competition for stressed seedlings
- Provide extra light: Helps photosynthesis and recovery
Succulents and cacti:
Symptoms:
- Soft, mushy stems (especially at soil line)
- Yellow, translucent leaves
- Root rot (succulent roots very sensitive to salts)
Treatment:
- Don’t flush heavily: Succulents hate wet soil
- Remove from soil: Gently shake off contaminated soil
- Trim rotted roots: Cut back to healthy tissue
- Let roots dry: Air-dry for 24-48 hours
- Repot in fresh cactus mix: Use well-draining soil
- Wait 1 week to water: Let roots heal
- Never fertilize succulents heavily: Use 1/4-strength fertilizer at most
Acid-loving plants (azaleas, blueberries, hydrangeas):
Symptoms:
- Interveinal chlorosis (yellow leaves with green veins)
- Leaf drop
- Stunted growth
Treatment:
- Flush thoroughly: Especially important (these plants very salt-sensitive)
- Check pH: Excess fertilizer may have raised soil pH
- Add sulfur if needed: Lowers pH if it increased
- Apply iron chelate: Addresses chlorosis from nutrient lockup
- Use acidic mulch: Pine needles or oak leaves
- Resume with acid fertilizer: Use fertilizers formulated for acid-loving plants
Long-Term Prevention Strategies
Avoid over-fertilization in the future.
Follow label directions exactly:
Read and follow instructions:
- Use exact amount specified on label
- Don’t assume “more is better”
- Measure — don’t guess or eyeball
- Use measuring spoons, cups, or scale
- Check whether rates are per plant, per square foot, or per gallon
Dilution for liquid fertilizers:
- Use measuring devices (not bottle cap)
- Mix at recommended strength
- Don’t make concentrate stronger than directed
- Keep diluted fertilizer labeled
Understand fertilizer numbers (N-P-K):
What the numbers mean:
- First number (N): Nitrogen (leaf growth)
- Second number (P): Phosphorus (roots, flowers, fruit)
- Third number (K): Potassium (overall health, disease resistance)
Choose appropriate ratio:
- High nitrogen (20-10-10): Leafy greens, lawns (use cautiously — most prone to burn)
- Balanced (10-10-10): General-purpose
- Bloom booster (10-30-20): Flowering plants
- Low numbers (5-5-5): Gentle; good for containers and sensitive plants
Follow safe fertilizing practices:
Always fertilize moist soil:
- Water plants 1 hour before fertilizing
- Never apply fertilizer to bone-dry roots
- Moist soil dilutes fertilizer; prevents concentrated contact with roots
Use slow-release fertilizers:
- Gradual nutrient release over weeks or months
- Less risk of sudden salt buildup
- Osmocote, Nutricote, or organic slow-release (blood meal, bone meal)
Fertilize less frequently:
- Most plants need fertilizer every 4-6 weeks during growing season
- Some plants (cacti, succulents) need fertilizing only 2-3 times per year
- Indoor plants: monthly during spring/summer; stop in fall/winter
Dilute liquid fertilizers:
- Use half-strength fertilizer twice as often
- Gentler on roots; steadier nutrient supply
- Especially important for: containers, seedlings, sensitive plants
Flush containers periodically:
- Even with correct fertilizing, salts accumulate in pots over time
- Flush every 3-4 months (water until runoff; repeat 2-3 times)
- Prevents buildup before it causes problems
Avoid combination mistakes:
- Don’t use fertilizer-enriched potting soil AND add more fertilizer
- Don’t combine synthetic and organic fertilizers without reducing rates
- Don’t fertilize newly transplanted plants (wait 2-4 weeks)
- Don’t fertilize drought-stressed plants (water first; fertilize later)
Soil testing:
Test before fertilizing:
- Home soil test kits or send sample to extension service
- Shows which nutrients are actually deficient
- Prevents over-application of nutrients already adequate
- Test every 2-3 years for garden beds; annually for lawns and high-use areas
Adjust based on results:
- Only supplement deficient nutrients
- Don’t add what’s already present in sufficient amounts
- Follow test recommendations for rates
Organic fertilizer alternatives:
Lower burn risk:
- Compost: Gentle, slow-release nutrients
- Compost tea: Liquid feed; nutrients in plant-available form
- Worm castings: Rich in nutrients; won’t burn
- Aged manure: Composted for at least 6 months (fresh manure burns)
- Fish emulsion: Dilute properly; strong but safe when used correctly
- Kelp meal: Trace minerals; growth hormones; low NPK numbers
Why organic is safer:
- Nutrients released slowly as organic matter breaks down
- Less likely to cause salt buildup
- Improves soil structure and microbial life
- Still possible to over-apply, but wider margin of error
For more information on using organic fertilizers safely, see our organic fertilizer guide.
The Bottom Line
Over-fertilized plants can be saved if treated immediately — within 24-48 hours of damage appearing. The most critical step is flushing soil with large volumes of water to dissolve and wash away excess fertilizer salts: for container plants, flush with 2-3 times the pot volume of water and repeat 2-3 times over several hours; for in-ground plants, apply 2-3 inches of water slowly over 2-4 hours using a soaker hose or drip irrigation.
Remove severely burned leaves (more than 50% brown), as these won’t recover and drain the plant’s energy. Place the plant in bright indirect light away from temperature extremes, and stop all fertilizer applications for at least 4-6 weeks — damaged roots can’t absorb nutrients properly and additional fertilizer will worsen the damage. Watch soil moisture carefully during recovery, watering only when the top 1-2 inches dry out, as damaged roots are prone to rot if kept too wet.
Prevention is easier than treatment: always water plants before fertilizing (never apply to dry soil), use half-strength dilutions more frequently instead of full-strength applications, and flush container plants every 3-4 months even when fertilizing correctly to prevent salt accumulation. Most plants need far less fertilizer than gardeners apply — when in doubt, fertilize less and supplement with compost, which provides gentle nutrition without the burn risk of concentrated synthetic fertilizers.